Want to use Google Chat effectively and safely in your small business? This guide gives you all the information you need to set up and administer Google Chat in simple, plain English.
What is Google Chat?
Google Chat (previously Hangout Chat) “lets you ask quick questions, collaborate in group chats, create virtual rooms for team projects, and more” (Google, 2021) with people inside and outside your business; on your computer, Android or iOS device.
There are two types of Google Chat set ups:
- Informal one-on-one or group chats
- Rooms which can be unthreaded or threaded – but more on that later in the guide!
Getting started
Step One: Make sure your users have either:
- a computer with web browser: Google Chrome, Safari, or Firefox.
- the latest Gmail mobile app (which has Chat incorporated into it) from either Google Play or the Apple App Store.
Step Two: Make sure that Contact Sharing has been turned on.
- If Contact Sharing is turned off, then users will need to type in a work colleague’s full email address when setting up a Google Chat, rather than just searching for the person by name.
- And if users have contacts from outside the company who share names with people inside the company, then only the external contacts will show up (yes this is confusing, and no I don’t understand why Google would do that!)
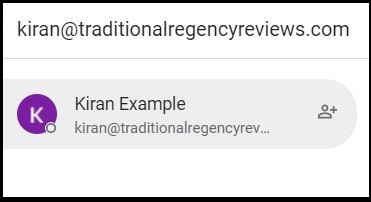
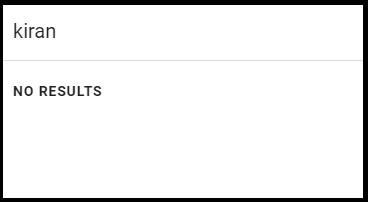
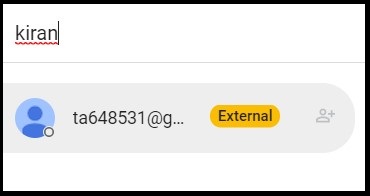
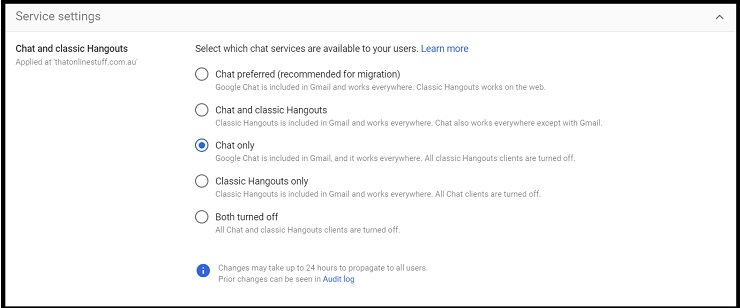
Step Three: Make sure you select Chat only—Chat works in Gmail and everywhere else. Classic Hangouts clients are turned off from the Google Chat settings in your Admin console. There are a number of other settings there which deal with Hangouts which is an older version of Google Chat. Hangouts is being phased out so just ignore those options.
Once you’ve selected Chat only then click on the Save button at the bottom right. Google does say that changes may take up to 24 hours to take effect but in my experience most small businesses will see the effects immediately.
Step Four: Decide whether users can automatically accept chat invitations or whether they have to manually accept invitations (for a small business, this is really a no brainer – set it to On).
- Go to Chat Invitations in your Google Workspace admin console
- Select On or Off.
- Click Save.

Using Google Chat with someone outside your organisation
By default, Google Workspace allows users to send chat messages to people outside of your business – with some caveats! External users:
- must be a Google Workspace user (with Chat enabled), or have an account that ends with @gmail.com or a non-Gmail Google Account.
- get an email invitation rather than being directly added
- can only be added to 1:1 messages unless ‘External Rooms’ has been enabled
- can’t add members or rename rooms.
- can’t be added to an existing internal-only room.
- can’t be added to a group message.
When a user adds an external user they’ll see an External label attached to the Google Chat as a reminder that the other person is from outside the organisation.
To change the external chat options:
- Go to External Chat Settings in your Google Workspace admin console
- Click on the pencil icon next to Chat externally and select the option you want
- Click on Save. Google claims it will take up to 24 hours for the change to take effect but I’ve found that the change is almost instantaneous with most small businesses.

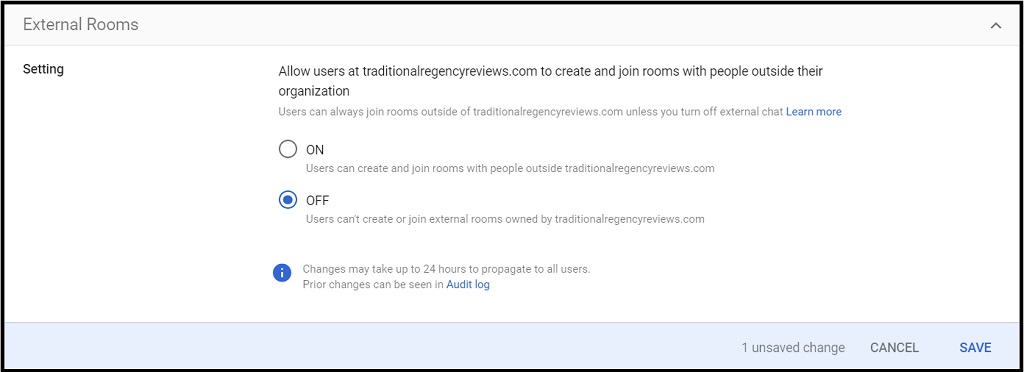
To change the External Rooms option:
By default, Google Workspace allows users to invite external users to participate in Google Chat Rooms. To change this:
- Go to External Rooms in your Google Workspace admin console (you may have to log in again)
- Select OFF and click on Save. Although Google states that it will take up to 24 hours for changes to propagate to all users this is really only for very large organisations. Most small businesses will see the change immediately.
Google Chat History settings
As an administrator, you can choose whether or not to keep a history of Google Chat conversations by default for employees in your business. There’s a couple of things to consider before you make this decision though, so take a look at the list below before we move to the actual ‘how-to’ steps:
- All messages (including direct messages) that were sent whilst history is turned off will be deleted after 24 hours.
- Users can still forward the last 4 Google Chat messages to Gmail even when history is turned off.
- History changes only apply to new messages. For example, if a user turns room history on, only new messages are saved. If a user turns room history off, old messages that were previously saved are still saved.
- If you change the room history setting to “Always On” or “Always Off,” this applies to existing rooms as well as new rooms. The history setting for existing rooms might therefore change.
- When history is off in a room, shared files won’t appear in that room’s “Files” section. They’ll show up in the Chat stream but after 24 hours they will be deleted along with all other messages.
- History is always enabled for ‘threaded’ rooms (in threaded rooms conversation threads help users discuss separate topics in the same room. More on this later in the guide).
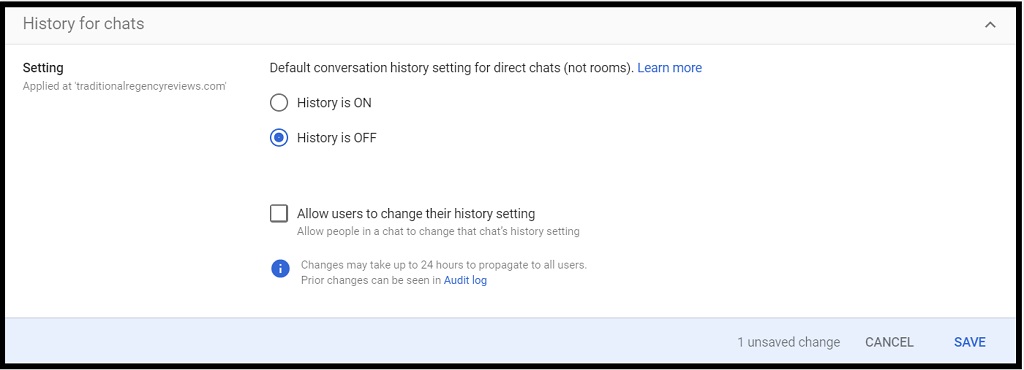
Changing history settings for 1:1 and group chats
- Go to History for chats in your admin console
- Turn History on or off. If you wish to ensure that the setting remains consistent across the business then deselect the checkbox Allow users to change their history setting
- Click on Save button. Google says this change may take up to 24 hours to roll out but I’ve found that for most small businesses the change is instantaneous.
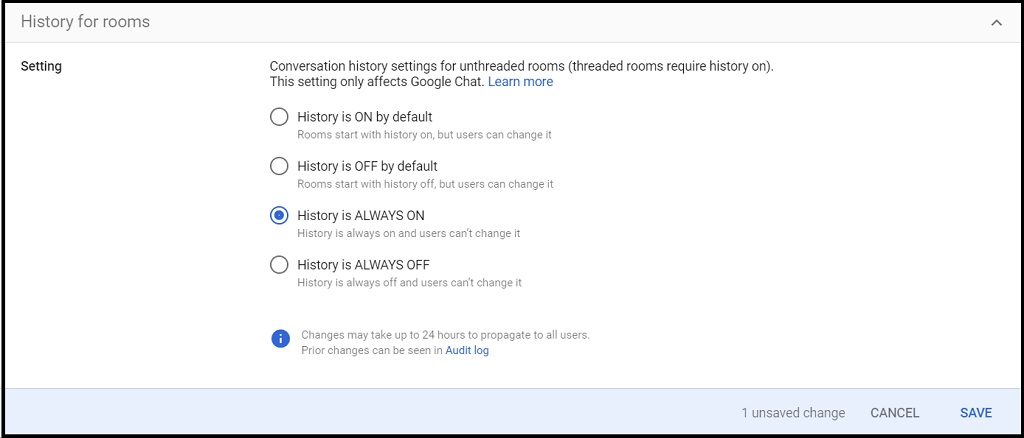
Changing history settings for Google Chat unthreaded rooms
- Go to History for rooms in your admin console
- Turn History on or off. If you wish to ensure that the setting remains consistent across the business then select either History is ALWAYS ON or History is ALWAYS OFF
- Click on Save button. Google says this change may take up to 24 hours to roll out but I’ve found that for most small businesses the change is instantaneous.
Differences between Google Group Chats and Google Chat Rooms
There aren’t any Google Workspace Administrator settings (other than those already discussed) to differentiate between Google Group Chats and Google Chat Rooms but it is worthwhile knowing some of the key differences to help your users.
Google Group Chats
- First two or three member names are listed rather than a specific chat name
- Can not create or assign tasks
- Can share files but not display a list of shared files
- Members can delete conversations from their own history – other group members will still see the full conversation history though
Google Chat Rooms
- Can create and assign tasks (if Tasks is turned on in Google Workspace admin console)
- Can have threaded conversations for multiple topics
- Can include people from outside the organisation
- Can display a list of shared files (if history is turned on)
- Can be given specific names
- Members can not delete rooms or conversations.
- Can be previewed before joining
- Can search for rooms
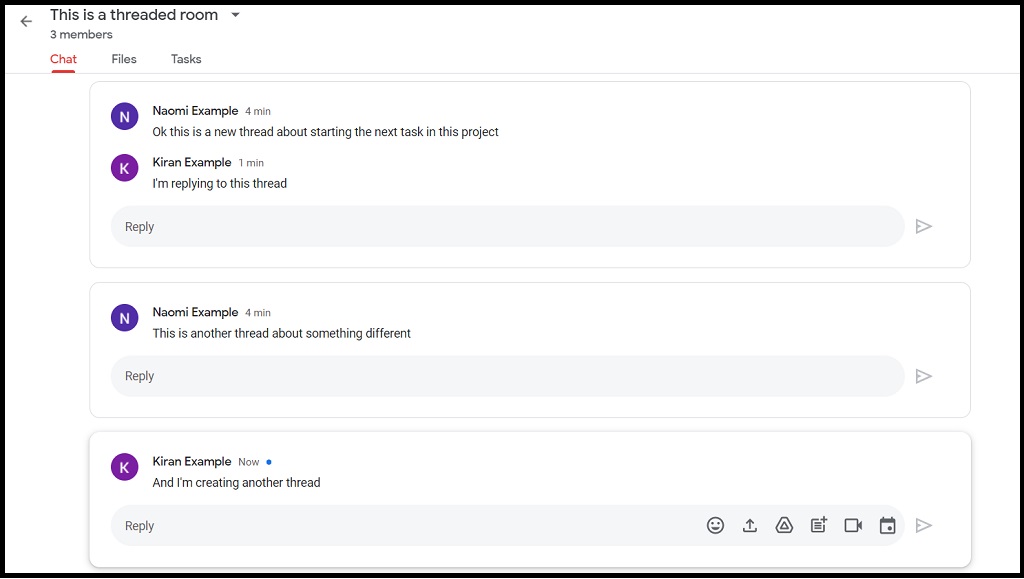
Differences between threaded and unthreaded rooms
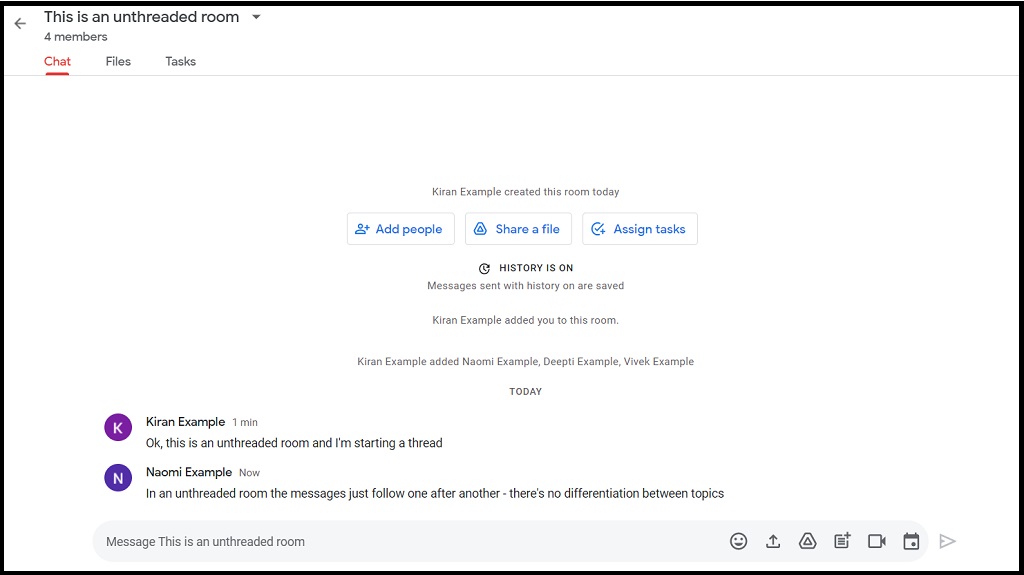
By default, Google Chat rooms have a single stream of unthreaded messages. However, turning on conversation threads when creating a room can help group members discuss separate topics in the same room.
There aren’t any Google Workspace administrator settings for this, but it may be helpful to know what conversations in a threaded room look like vs in an unthreaded room to help users know which one to select.
Google Chat bots
According to Google, you can use bots in rooms or direct messages to connect to services in Google Chat and look up information, schedule meetings, or complete tasks. The option to use these bots (including ones from Google Workspace marketplace) are turned on by default in any new Google Workspace installation. The chat bots that are available initially are:
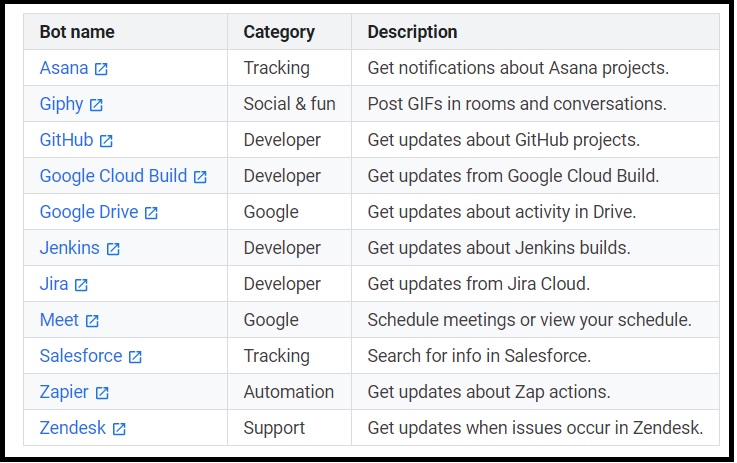
In my experience most of these bots aren’t of much use to small businesses – they’re much more useful in larger organisations – and allowing users in a small organisation to access bots from 3rd party developers can just be asking for trouble. My recommendation therefore is to turn this feature off:
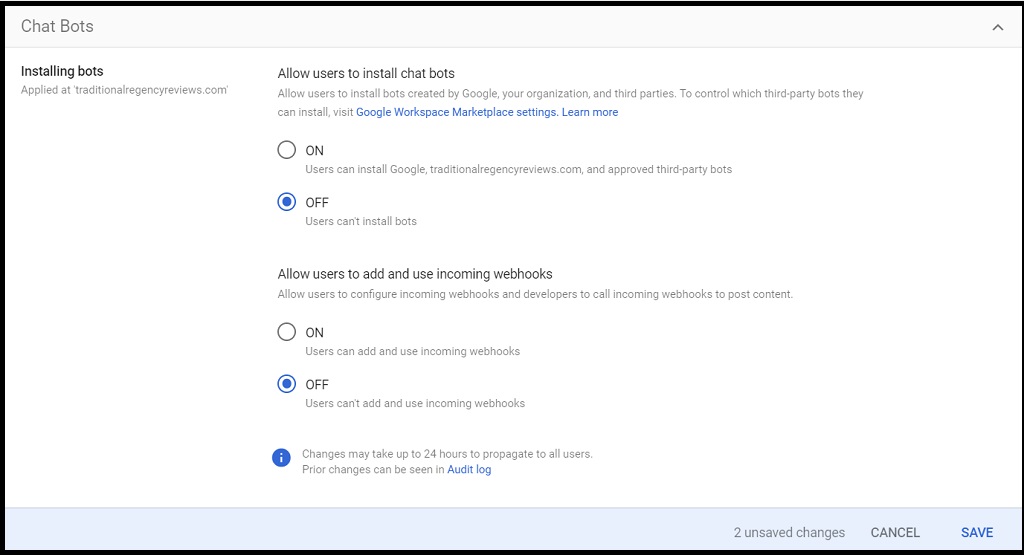
- Go to Chat Bots in your Google Workspace admin console
- Select OFF for both “Allow users to install chat bots” and “Allow users to add and use incoming webhooks”
- Click Save
Looking for help with a specific issue?
I can help with a number of common Google Workspace issues, such as regaining administrator access; fixing email delivery issues; and cybersecurity.
Leave a Reply