And this can happen to anyone – a regular user in your business or even yourself as a Google Workspace administrator.
Watch the video, or follow the article – your choice!
So there’s two things to check first:
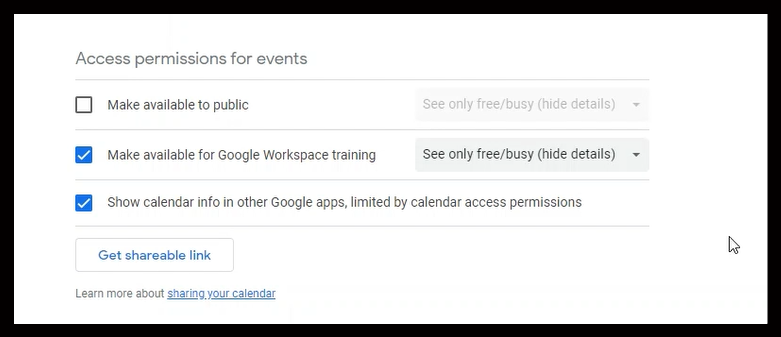
- Have you given your whole business permission to see your calendar? This is usually turned on by default, and if someone is in your business then they’ll still be able to see your calendar even if you delete them from the Share with specific people section.
- The second thing is to open an Incognito window, and then log into Google Calendar from there. Then try and delete the user.
If that still doesn’t work and you’ve confirmed that your whole business doesn’t have permission to see your calendar, then there is a (slightly) fiddly way to fix it! But I promise that it is actually quite simple to do – there’s just a bit of copying and pasting required.
The advanced way – but it’s still just copying and pasting!
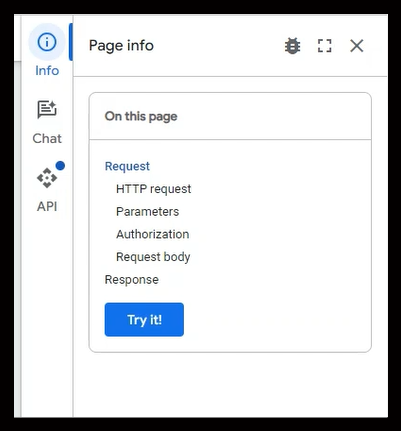
Open a browser tab and go to the Google Calendar API. This is basically a way for you to ‘talk’ to the backend of Google Calendar.
Then on the right hand side of the window, click Try It
Step 1: Add your calendar details
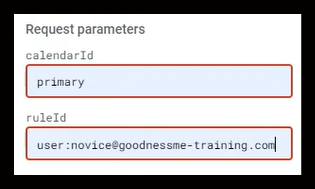
Then type the word primary in the calendarID field.

If you’re trying to remove someone from a secondary calendar that you own, then open up your Google calendar in a separate browser tab, click on ‘settings and sharing’ next to the calendar name, go down to Integrate Calendar and copy the full information under Calendar ID:

Then come back to the Developer Tab and paste that information into the calendarID field.
You can also do this for any other user’s calendar – just type their username (usually their email address) into the calendarID field if you want to amend their primary calendar, or ask them to send their secondary calendar ID to you.
Step 2: Add the other person’s details
Now, type user: and the full email of the user that you want to remove in the ruleID field. For example novice@goodnessme-training.com to remove Novice Hame from your calendar.
Step 3: Put the code in that’ll remove the user
Click the blue icon next to Add request body parameters and click on role.
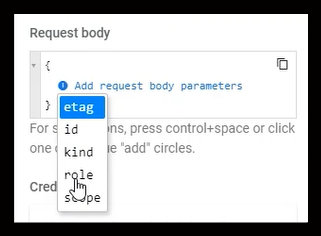
Then type none between the quotation marks.
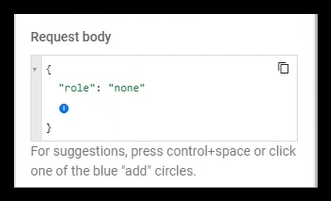
Then click on Execute.
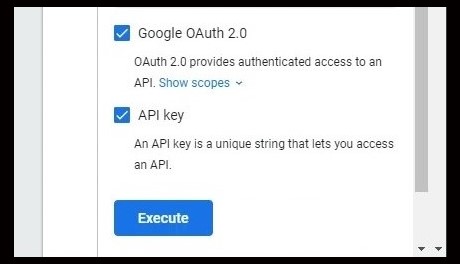
You’ll probably be asked to give permission to Google to change this, say yes to everything.
You’ll then see some green code, which indicates that the user has been removed, and if you go back to your Google Calendar’s Settings page you can see that for yourself!
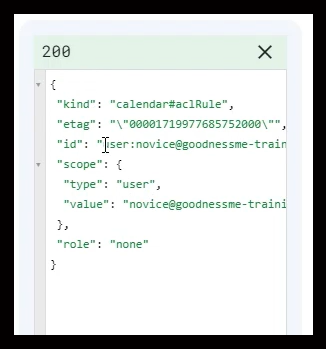
You can also use these steps to remove external users as well which is very handy.
Remember: Check the organisational sharing
If the other user is still claiming they can see your events, then make sure you’ve removed the permission for your whole organisation to see your calendar – or at least changed it to Free/Busy.

Looking for help with a specific issue?
I can help with a number of common Google Workspace issues, such as regaining administrator access; fixing email delivery issues; and cybersecurity.
Leave a Reply