If you’re using Google Workspace and want to automatically add a signature block to every email you send via Gmail do the following:
- Open Gmail
- Click on the settings icon in the top right (looks like a Gear icon)
- Click on See all Settings
- Scroll down the page until you see the section titled ‘Signature’
- In the ‘Signature’ section, add the text of your signature to the box. If you want to, you can format your message by adding an image or changing the text style. You can also create links to websites and social media pages as well.
- At the bottom of the page, click Save changes.
Now, every time you create a new email from Gmail or reply to someone else’s email your signature block will be shown by default. This is what mine looks like. You can see I’ve put links to my website, Twitter and places where people can buy my productivity book.

Automatically change signature blocks depending on whether it is a new email or not
Want to have a different signature block when you’re replying to an email than when you’re sending a new email?
- Open Gmail
- Click on the settings icon in the top right (looks like a Gear icon)
- Click on See all Settings
- Scroll down the page until you see the section titled ‘Signature’
- Click on Create new
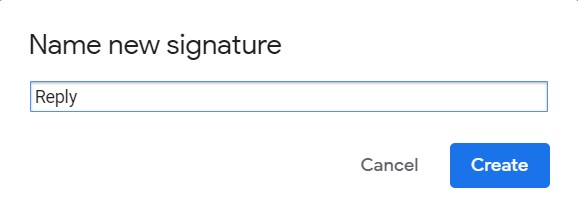
- Type a name for your new signature – I’m not very creative, so this is called ‘Reply’

- Click on Create
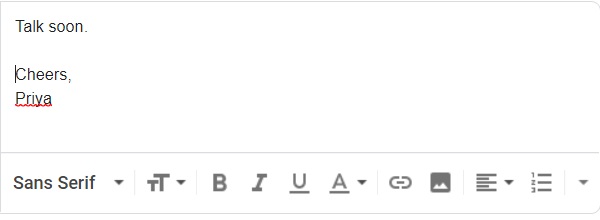
- Now type in the signature block you want to use. Again, I’m not being very creative so I’ve just put a very quick little signature in but you can do all the bells and whistles that you want like links, images and text formatting.

- Now scroll down a bit further and click on the down arrow under ‘On Reply/Forward use’ and select the signature you’ve just created.
- Scroll all the way to the bottom of the page and click on Save Changes.
- You’ll now see different signature blocks depending on whether you’re creating a new email or replying to/forwarding an email.

Of course when you create your email, if you want to delete your signature block entirely and write something different then that’s perfectly fine too!
Using pre-set signatures in the Gmail mobile app
Google claims that once you set up a signature block on the computer any emails you send from the Gmail mobile app will have the same signature automatically added but that doesn’t work for me. I just type in my own signature block for any emails I send from my phone.
If you’d like to have a default signature block on your emails sent from your mobile then:
- Open the Gmail app
- In the top left, tap Menu
.
- Scroll to the bottom, then tap Settings.
- Choose the Google account in which you want to add a signature.
- Tap Mobile Signature.
- Enter the text for your signature. This is basically just text – no formatting or links available.
- Tap OK.
Switching between signature blocks when composing an email
Ever wanted to switch between signature blocks when composing an email? Maybe even though this is a new email it is being sent to someone who knows you really well and doesn’t need all your contact details. Or maybe you don’t normally include all your contact details but this time you do want to.
- Open Gmail
- Click on the settings icon in the top right (looks like a Gear icon)
- Click on See all Settings
- Scroll down the page until you see the section titled ‘Signature’
- Click on Create new
- Type a name for your new signature – let’s call this one ‘No contact’
- Click on Create
- Now type in the signature block you want to use.
- Scroll all the way to the bottom of the page and click on Save Changes
Now, open a new email. You’ll see your default signature there initially but if you click on the pen icon at the bottom of the email you’ll be able to select the new signature block you’ve created.
Want more personalised help?
I hope this article was of assistance to you, but if you want more personalised help with your Google Workspace issue then why not get in touch?

2 replies on “Setting up Gmail Signature blocks in Google Workspace”
[…] Once you’ve set up one or more email aliases, then you may want to also set up specific signatures for each address. […]
[…] Once you’ve set up one or more email aliases, then you may want to also set up specific signatures for each address. […]